

Go beyond Suitelets. Build full custom web apps that connect to NetSuite using REST/Restlets, with the UI control SuiteScript can't give you.
Introduction
I have created many custom applications using HTML, CSS, JQuery, and Bootstrap. A backend Suitelet is used to communicate with NetSuite. I will detail a basic web application which uses these technologies to create a vendor record in NetSuite.
Step 1: Download libraries.
Download Bootstrap:
https://getbootstrap.com
Download JQuery:
https://jquery.com
Step 2: Create an HTML page using the Bootstrap library where user can enter vendor details.
Code for WebApplication.html
<!doctype html>
<html lang="en">
  <head>
    <!-- Required meta tags -->
    <meta charset="utf-8">
    <meta name="viewport" content="width=device-width, initial-scale=1, shrink-to-fit=no">
    <!-- CSS File bootstrap.min.css - UPDATE THIS LINK ONCE UPLOADED TO NETSUITE-->
    <link href="/core/media/media.nl?id=8761&c=TSTDRV2670723&h=T2hGKNOPEmYxfxGBHScCcbI30zXHNK32v9B2vBsM4WR-jJiC&_xt=.css" rel="stylesheet" />
    <style type="text/css">
      .hidden { display: none; }
      .form-inline > * {
        margin: 0px 5px !important;
      }
    </style>
    <title>Create Vendor</title>
  </head>
  <body>
    <div id="defaultMenu" class="container" style="margin-top:10px;">
      <div class="row align-items-center justify-content-center">
        <div class="col">
          <h4>Menu</h4>
          <div class="btn-group-vertical">
            <button id="createVendorMenuButton" type="button" class="btn btn-info btn-lg">Create Vendor</button>
          </div>
        </div>
      </div>
    </div>
    <!--  CREATE VENDOR SCREEN -->
    <div id="createVendorScreen" style="margin-top:10px;">
      <div class="container">
        <div class="row">
          <div class="col-md-auto">
            <div class="form-group form-inline">
              <label for="vendorName">Vendor Name</label>
              <input id="vendorName" type="text" value="" placeholder="Vendor Name" class="form-control">
            </div>
          </div>
        </div>
        <div class="row">
          <div class="col-md-auto">
            <button id="createVendorButton" type="button" class="btn btn-info btn-lg">Create Vendor Record</button>
          </div>
        </div>
      </div>
    </div>
    <!-- jquery.3.2.1.min.js -->
    <script src="/core/media/media.nl?id=8763&c=TSTDRV2670723&h=BVUHw_ThmPkbJRStRyxSHvfTTRH_ZQsa9NlJKkHOpRE4pbjm&_xt=.js" type="text/javascript"></script>
    <!-- bootstrap.min.js -->
    <script src="/core/media/media.nl?id=8762&c=TSTDRV2670723&h=3gEyhD-XUEG_DxY29qLZAHz6UmSEFUHu5vzMsjblGADNroFX&_xt=.js" type="text/javascript"></script>
    <!-- WebApp_ClientScript.js -->
    <script src="/core/media/media.nl?id=8758&c=TSTDRV2670723&h=Xii5wm_o6bZ54YYy503HpQQtjSwo26I0BN_efvHatvxgAYd-&_xt=.js" type="text/javascript"></script>
  </body>
</html>
Step 3: Create a client script for the HTML page which will contact the Suitelet using AJAX.
Code for WebApp_ClientScript.js:
					/*
 * Name: WebApp_ClientScript.js
 */
var suitelet = '';  // PUT EXTERNAL LINK TO SUIELET HERE
$(document).ready(function(){
	hideScreens();
	$('#defaultMenu').show();
	// Show the menu
	$('#createVendorMenuButton').click(function(){
		hideScreens();
		// show create vendor screen
		$('#createVendorScreen').show();
		$(document).prop('title', 'Create Vendor');
		$('#vendorName').focus();
	});
	$('#createVendorButton').click(function(){
		var vendorName = $( "#vendorName" ).val();
		if (!vendorName) {
            alert('Vendor Name is required.');
		}
		else {
			vendorName = vendorName.trim();
			createVendor(vendorName);
		}
	});
function hideScreens() {
	$('#defaultMenu').hide();
    $('#createVendorScreen').hide();
}
function createVendor(name){
	$.ajax({
		url: suitelet+'&rf=createVendor&cb=_createvendor',
		dataType: 'jsonp',
		jsonpCallback:'_createvendor',
		type:'post',
		data:{
            name : name
		}
	})
	.done(function(data){
			console.log('data', data);
			if (data.error) {
                alert('Error : ' + data.error);
			}
			else {
                alert('Vendor ' + name + ' created successfully.  Internal ID is ' + data.recordId);
                hideScreens();
                $('#defaultMenu').show();
			}
	});
}
});
Step 4: Create the Suitelet.
Code for WebApp_CreateVendor_SL.js:
					/**
 *@NApiVersion 2.1
 *@NScriptType Suitelet
 */
/* Name : WebApp_CreateVendor_SL.js
 *
 * Back end suitelet used to create vendor record.
 */
define([ 'N/record'], (record) => {
    onRequest = (context) => {
    	log.debug('rf', context.request.parameters.rf);
        const routingFunction = context.request.parameters.rf;
        const callback = context.request.parameters.cb || '';
        try {
			switch(routingFunction){
				case 'createVendor':
				data = createVendor(context);
			    break;
			 }
			 data = callback + '(' + JSON.stringify(data) + ')';
			 log.debug('data sending', data);
        }
        catch(e) {
        	 data = { error: 'Failed : ' + e.message };
			 data = callback + '(' + JSON.stringify(data) + ')';
			 log.debug('Error', JSON.stringify(e));
        }
        context.response.setHeader('Custom-Header-Content-Type', 'application/json');
		context.response.write(data);
    }
    createVendor = (context) => {
        const vendorRecord = record.create({
            type: 'vendor',
            isDynamic: true
        });
        vendorRecord.setValue('companyname', context.request.parameters.name);
        vendorRecord.setValue('subsidiary', 1);   // default the subsidiary
        const recordId = vendorRecord.save();
        return {
            recordId : recordId
        };
    }
    return {
        onRequest: onRequest
    }
});
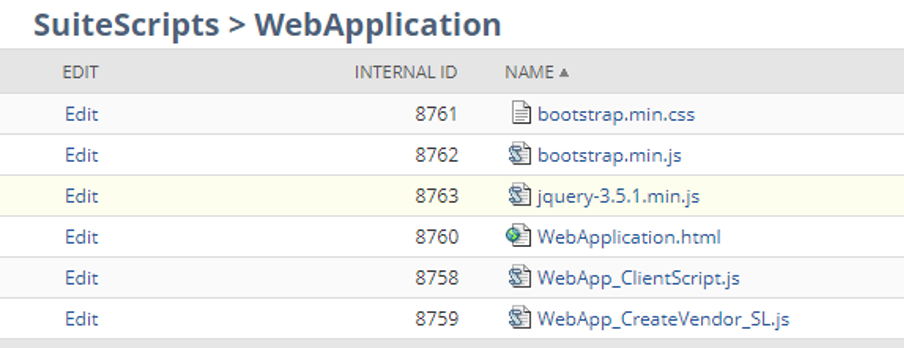
Step 5: Upload all files to a directory. Your directory should look like this:
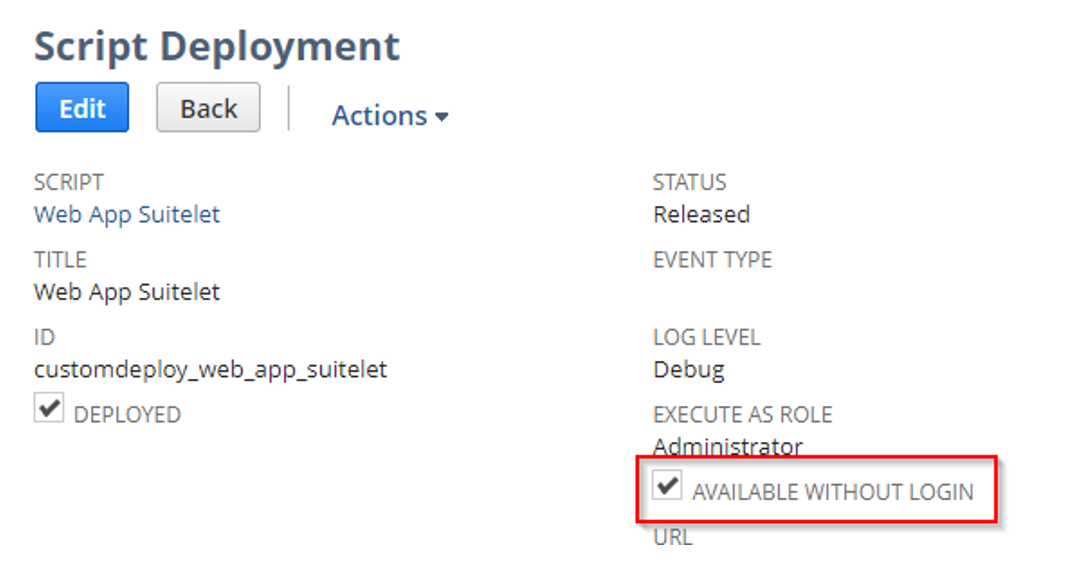
Step 6: Deploy the Suitelet in Released status and make sure to make it available without login.
Step 7: Open the Web Application HTML page in your browser and create your new Vendor.
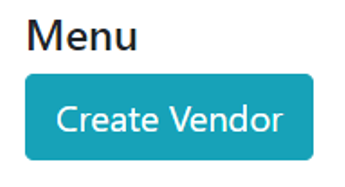
The first page is simply a menu with button which when clicked takes you to another page to enter the vendor’s name. When creating a small application, I like to put all the HTML in one page separated by DIVs.
Landing Page:
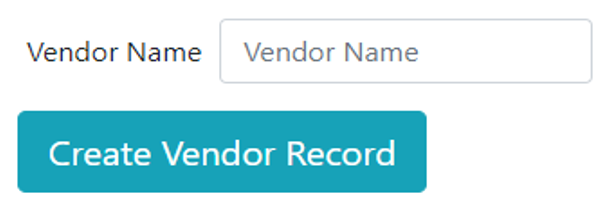
Page where you enter a Vendor Name:
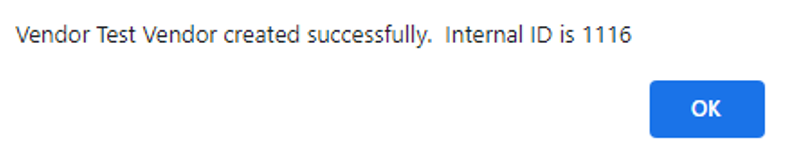
After successful creation of the vendor record you get an alert and are then taken back to the menu page.
Conclusion
Although this is a very simple application, it shows the power of being able to work outside the confines of a front end Suitelet. You have complete control over how the user interface looks and behaves using the many libraries available for free.